How to Create an entity table
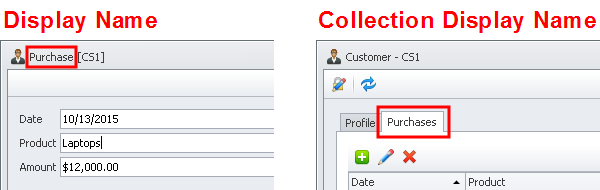
Entity table is displayed in the entity dialog box (detail view). For example, the Customer dialog box can show the Purchases tab with the table that lists all purchases of the given customer. 
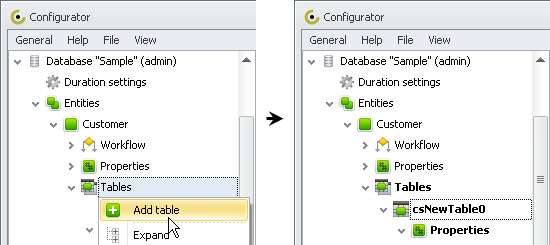
To create an entity table
1. Log on to the database in Configurator.
2. Click the right-pointing arrow next toEntities, click the right-pointing arrow next to required entity, right-click Tables, and click Add Table.
3. Enter table settings and click Save.

Note The Display Name is shown in the title of the table item, so you may want to have the display name in the singular, while the Collection display name can be shown in the title of the tab that contains the table, so you may want to have the collection display name in the plural.
4. Create Custom Table or Related Table.
5. Click the General menu, and then click Commit.
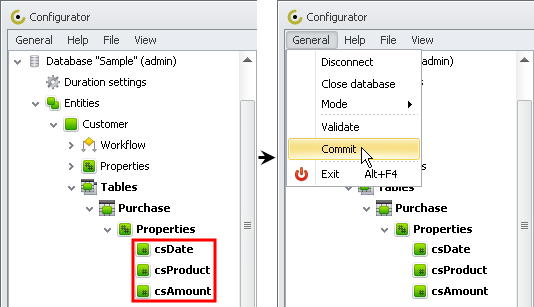
1. Custom Table
Custom table is an entity table which properties are added manually.
To add table property
- Right-click Properties, and then click Add Property.

Learn how to create custom properties
2. Related Table
Related table is an entity table which refers to another entity, so related table properties are added automatically.
To add related table
1. Select the Related Table check box, and click required related entity type.
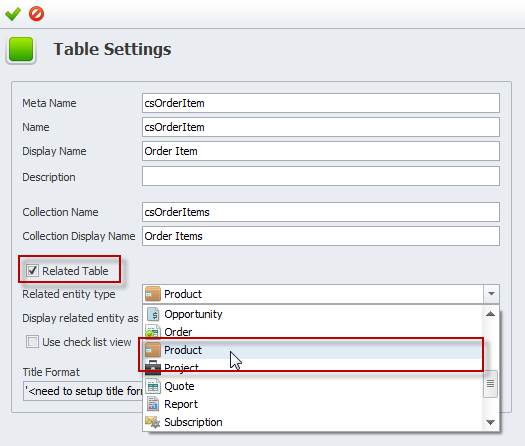
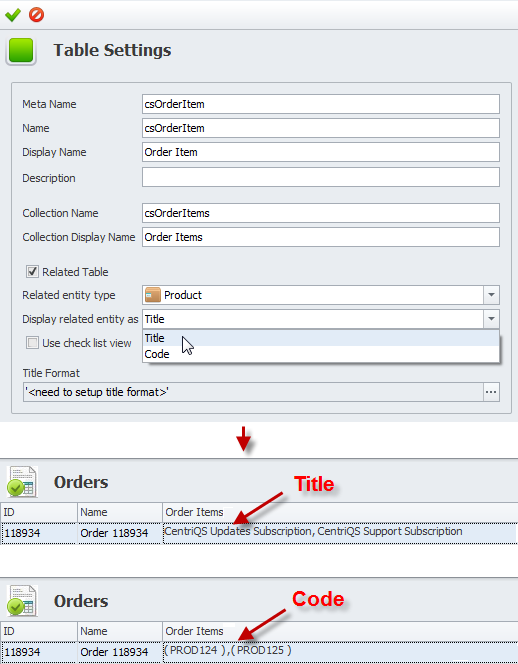
2. In the Display related entity as list, click Title or Code.
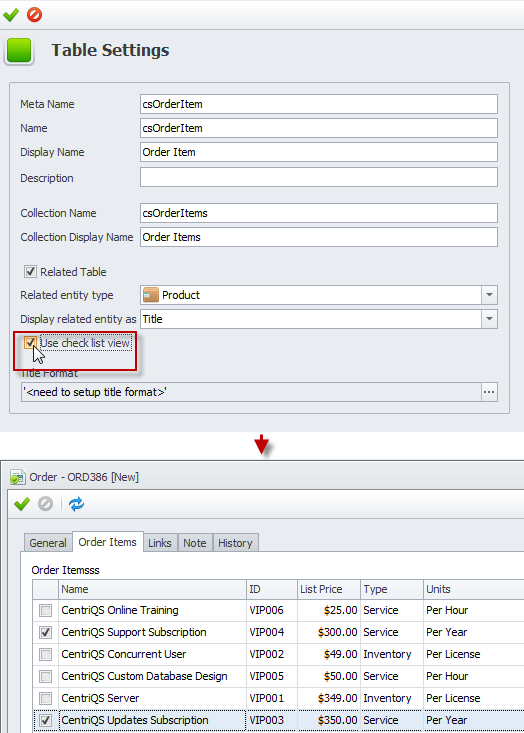
3. Select the Use Check List view check box, if you want entity table to display all items in the list, while users should select check boxes next to required items only.
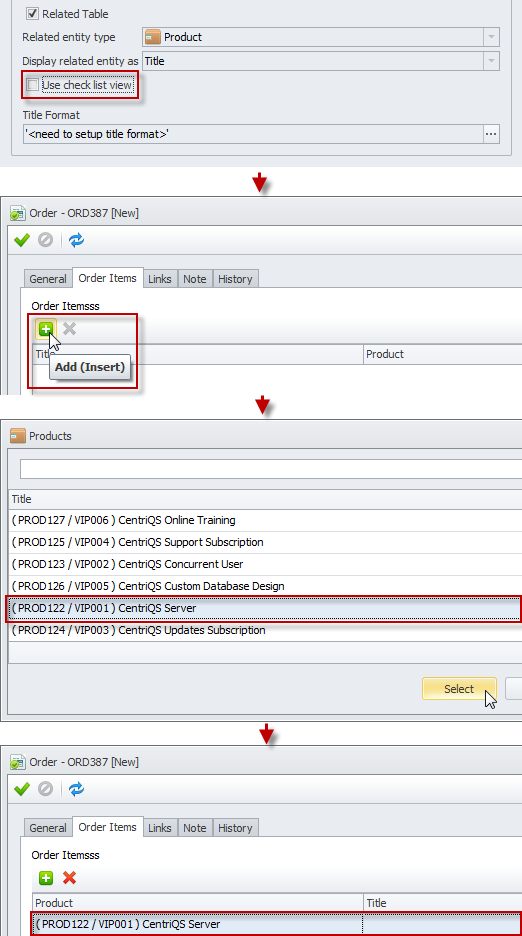
Note If you leave the Use check List view check box empty, users will click Add, click required item in the list, and then click Select to add items to the entity table.
Related articles:
How to create a custom property
How to choose custom property's data type